TexSlide 0.9.4 Release
TexSlide 0.9.4 is now available! This update brings multiple editing and layout enhancements, including text/formula transparency, Master View enhancements, Theme Colors, and sidebar improvements, plus performance optimizations and bug fixes.
Text and Formula Transparency
Transparency is commonly used to de-emphasize secondary information and improve visual hierarchy. Text (including underline, strikethrough, etc.) and formulas now support transparency settings, and transparency is preserved correctly when exporting to PDF.
How to Use
You can set transparency here:
- Sidebar: Properties → Character → Transparency
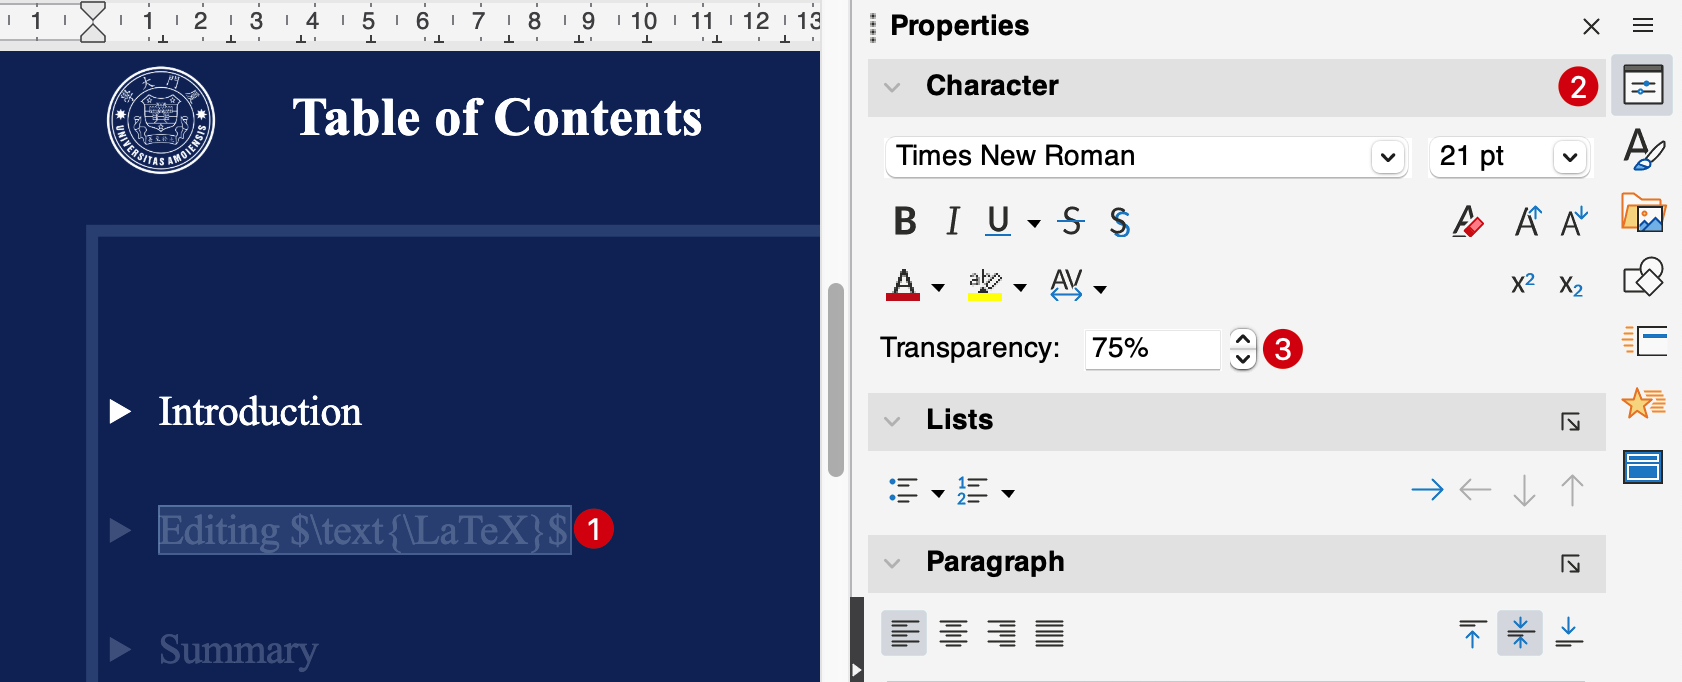
Set transparency in “Properties → Character”
Master View Enhancements
For presentations that require consistent layouts and reusable templates, Master View is one of the most efficient workflows. This update further enhances Master View: you can copy/paste master slides and reorder them via drag-and-drop.
How to Use
You can enter Master View in several ways:
- Menu bar: View → Master Slide
- Toolbar: Master View icon
- Sidebar: Properties → Slide → Master View
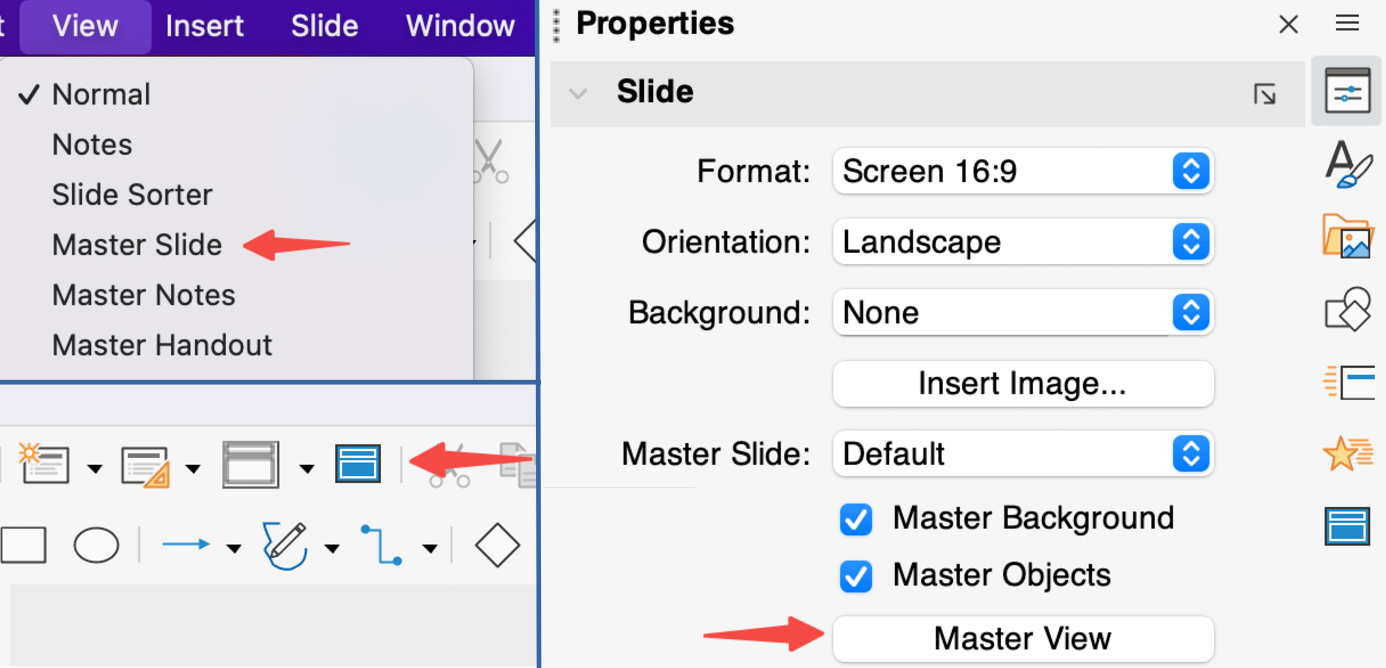
Three entry points: menu bar, toolbar, and sidebar
In Master View, you can:
- Copy/paste master slides to quickly reuse styles
- Drag master thumbnails to reorder them
Copy, paste, and drag to reorder master slides
Apply a Master to a Slide
After you finish designing masters, select a master for the current slide here:
- Sidebar: Properties → Slide → Master Slide
Note: Layouts below are not bound to masters.
Select and apply a master to the slide
Theme Color Management
A new Theme Colors dialog lets you add, edit, and delete theme colors, so you can manage a consistent color system across your presentation.
Theme colors consist of 12 base colors with multiple derived variations. They are defined purely by RGB values and saved with the document, ensuring consistent rendering across devices.
Recommended Usage
Theme colors can be applied to many places, such as:
- Slide background (including background images / elements)
- Shape fills and strokes
- Text colors
We recommend using theme colors for your main palette. When you need to refresh the overall look, updating theme colors can apply changes across the presentation.
How to Use
- Menu bar: Slide → Theme Colors
Apply theme colors
Sidebar Extensions: Styles
This update brings back the Styles panel, making it easier to manage and reuse consistent formatting across your presentation and reduce repetitive per-object adjustments.
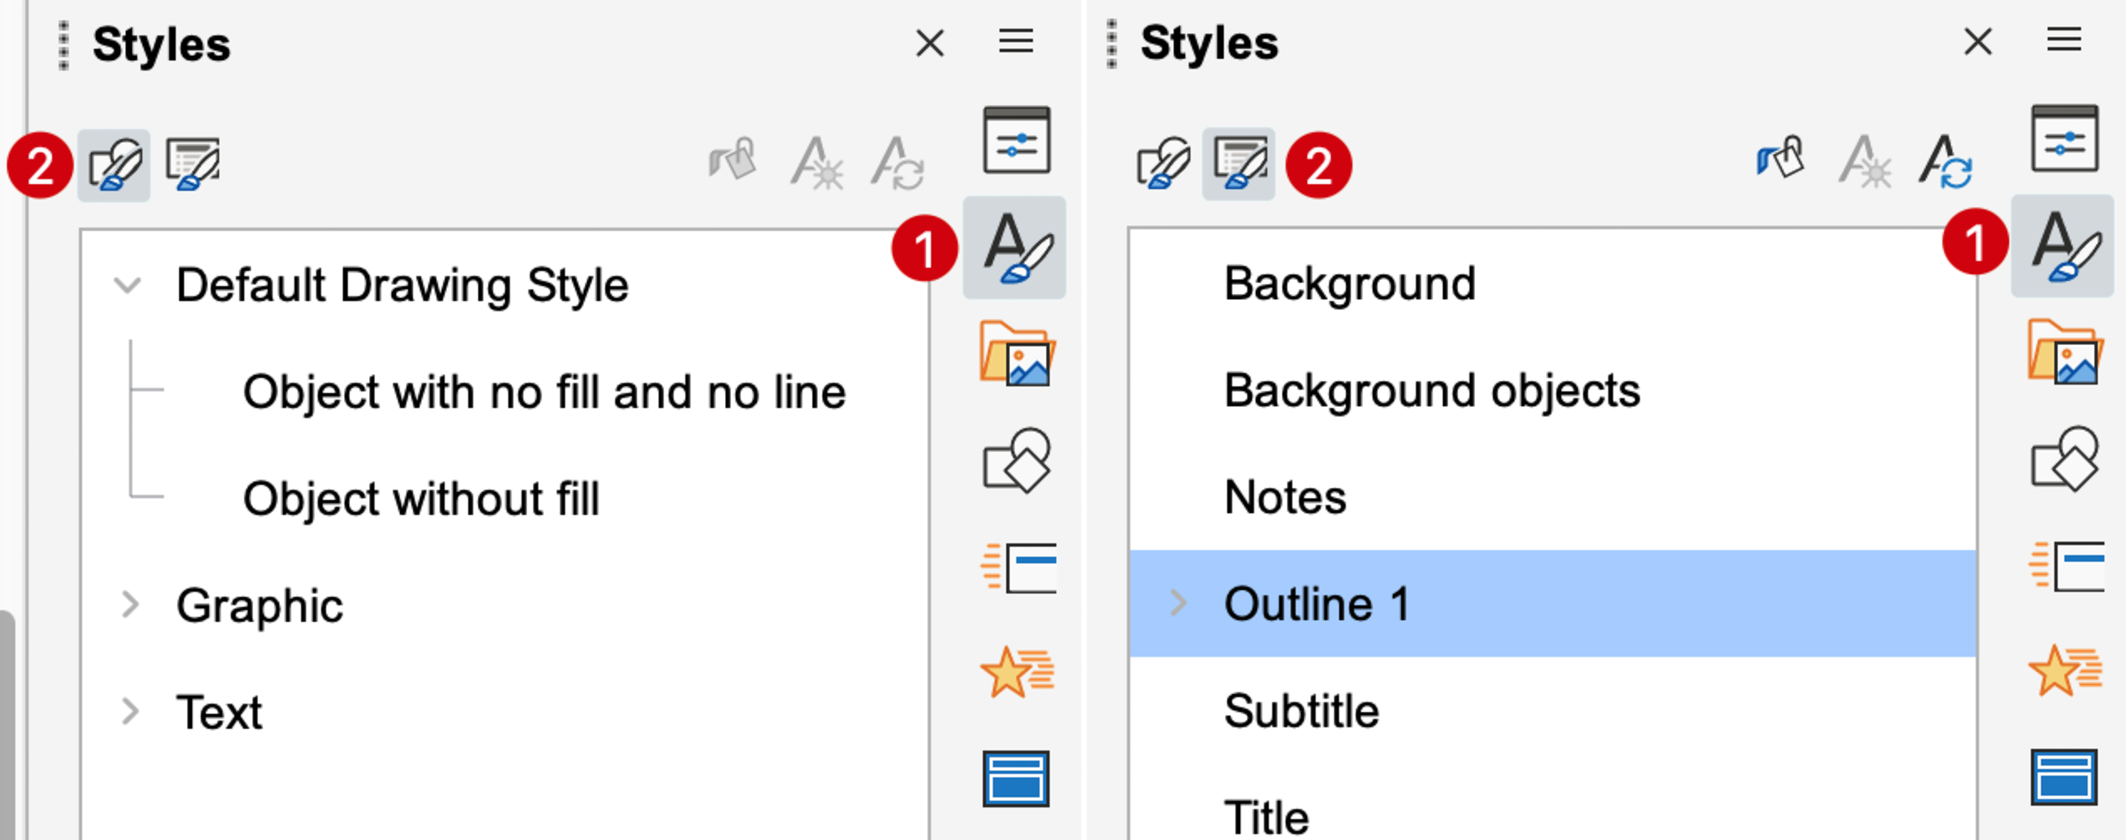
Drawing styles and presentation styles
Drawing Styles
Drawing styles mainly apply to manually inserted/drawn objects (shapes, lines, arrows, regular text boxes, etc.). New objects inherit the Default Drawing Style, and you can also apply other drawing styles to objects. Common properties you can unify include: lines/arrows, fills and transparency, shadows, and the font, size, color, and alignment of text inside shapes.
You can edit them in the following ways:
- Sidebar → Styles: switch to Drawing Styles, find the style you want to adjust (e.g. Default Drawing Style), right-click and choose New/Edit Style
- Object right-click: right-click a newly created text box or shape and choose Edit Style
If you want multiple sets of graphic styles in the same document, you can create and save custom drawing styles in Sidebar → Styles; after selecting an object, double-click a style to apply it.
Presentation Styles
Presentation styles mainly apply to auto text boxes in layout placeholders (title, subtitle, outline, etc.). After you modify them, the changes take effect globally on slides that use the corresponding master, which is suitable for unifying title/body hierarchy, bullets, indents, spacing, and other layout rules.
You can edit them in the following ways:
- Sidebar → Styles: switch to Presentation Styles, find styles such as Title / Outline, right-click and choose Edit Style
- Placeholder right-click: select a placeholder on the current slide or master, then right-click Edit Style
- Edit in Master Slide: enter Master Slide view, select the placeholder, and edit its style
Editing presentation styles
Notes:
- Presentation styles are bound to the master slide. If you switch to a different master, you may need to adjust styles for that master.
- For mixed English and CJK text, make sure to set both Western and Asian fonts in the style settings to avoid inconsistent font rendering.
Sidebar Extensions: Text Attributes
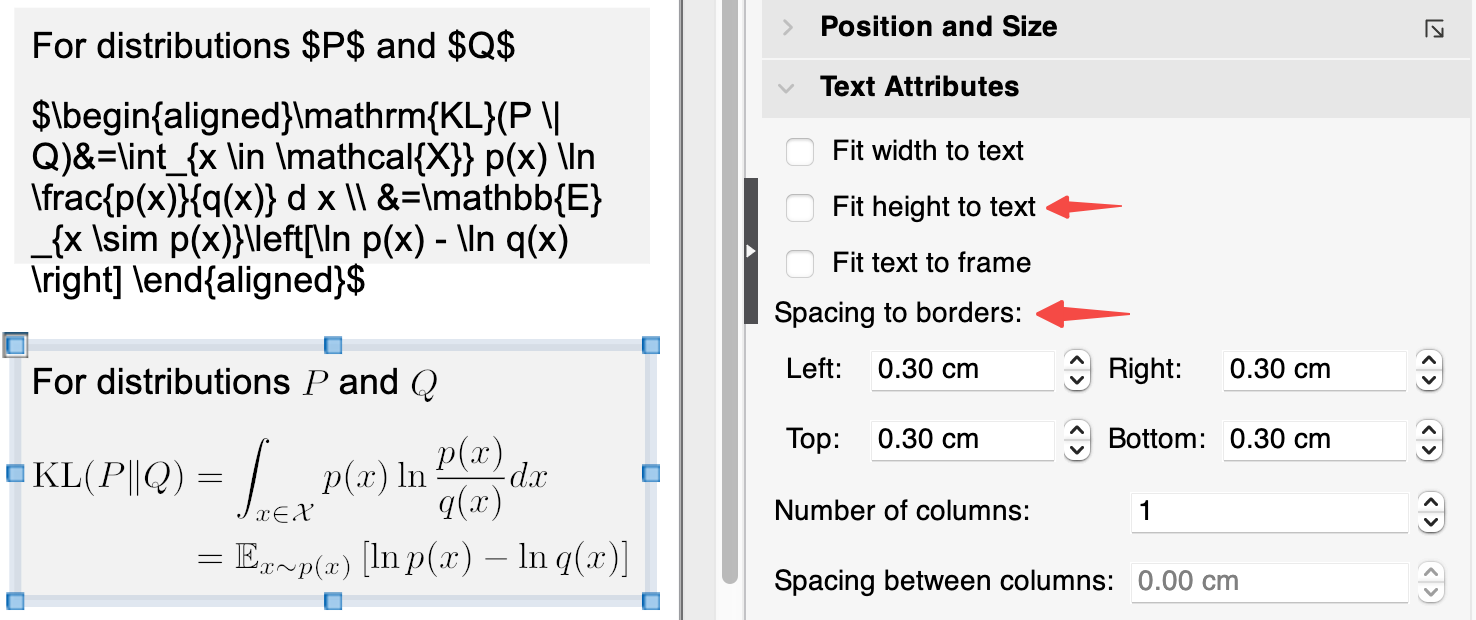
A new Text Attributes sidebar makes layout more efficient. Details such as the fitting behavior between text and its frame, and spacing to borders, can now be configured more centrally in the sidebar.
Inline LaTeX formulas currently share the same text box height between edit and render modes. Since edit mode displays the source, it often requires a taller text box than the rendered result; if the text box has a fill color, you may see extra colored blank space when rendered.
Workaround: disable Fit height to text, then manually adjust the text box height to better match the rendered result.
How to Use
After selecting a text box or shape, go to:
- Properties → Text Attributes
Common Options
- Fit width to text: frame width adapts to text content
- Fit height to text: frame height adapts to text content
- Fit text to frame: text scales/adapts to fit the frame
- Spacing to borders: padding between text and the border
Text attributes settings
Other Improvements and Fixes
Smart Bullets
For more consistent list typography, smart bullets use NotoSansSymbols2 by default. Bullet height, size, color, and transparency automatically align with and follow the text, staying visually stable across different font sizes and emphasis styles.
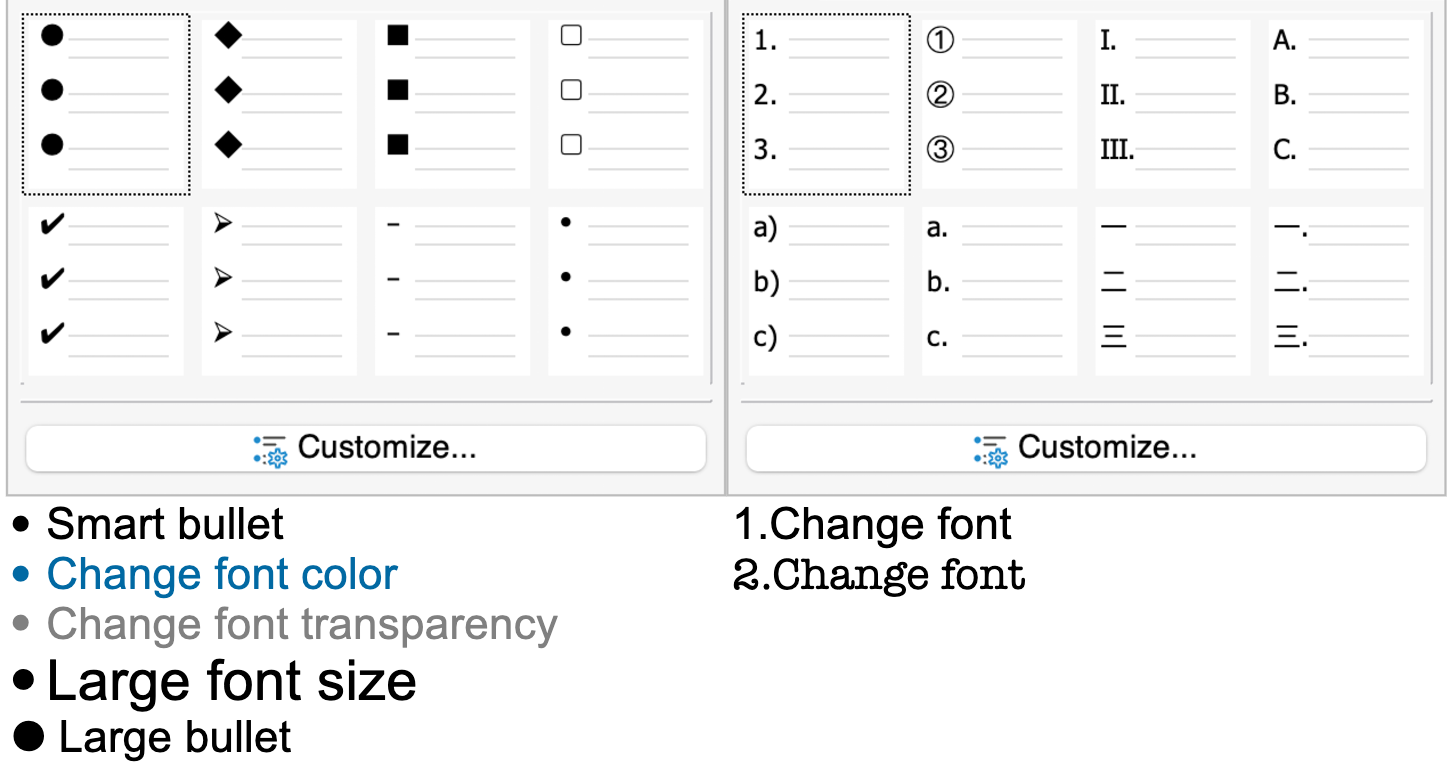
Smart bullets automatically align and sync with text
SVG Performance
Improved rendering performance for SVGs with linear/radial gradients, with more natural gradient transitions.

Radial gradient SVG rendering
Video Playback and Editing
Smoother video playback in presentation mode, plus a fix for ghosting when dragging videos in edit mode.
Ghosting fix when dragging
More
- Tiny object control: Better selection/movement for very small shapes; simplify handles while moving (corners only) for more precise positioning
- Typography: Improved automatic line breaks for hyperlinks and fixed incorrect font display in multilingual text
- Formula export fix: Fixed formulas containing Chinese text not showing up after PDF export
- Windows high-DPI fix: Fixed incorrect spacing in the sidebar Shapes panel on Windows (high-DPI displays)